TL;DR: My RG40XXV developed vertical color banding after carrying it in my pocket. AliExpress and Anbernic customer support sucks. DIY repair of an issue from flimsy screens , flimsy connectors and apparently using too much glue is a crime. Not perfect fix, but good enough.

Mister Xonglebongle suggested I should post this in the forums (I wasn’t even aware MuOS had forums, so kudos to him). I’m posting this in case it helps someone down the line who knows better and has more skill/expertise fixing electronics. So here I am.
Some preface:
I bought my RG40XXV from a generic AliExpress vendor (“Store123456” type) that disappeared from the platform in a “Snake Oil Salesman” business model from the Old Wild West.
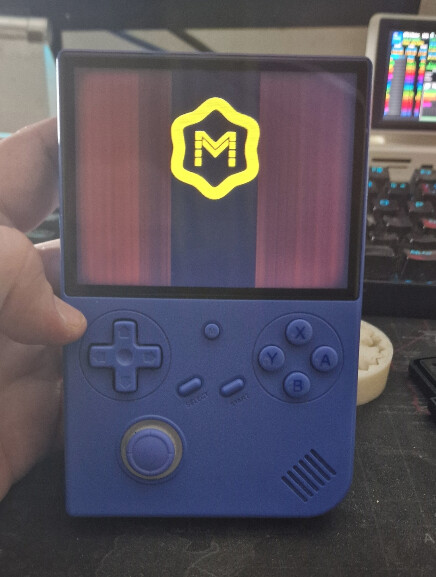
The screen started showing vertical red/green lines after simply being carried in my pocket on a stroll back home.
I tried to file a claim through AliExpress — they politely told me I could pay shipping back to China for a maybe refund (and of course I’d have to cover the shipping). I DID say I would accept a partial refund, they were not interested and didn’t guarantee even if I sent it that I would get anything whatsoever.
Spoiler: not going to happen. (and they offered the solution knowing full well I wouldn’t accept this)
I then contacted Anbernic directly.
Explained the issue, asked if they could sell me a replacement screen — fully willing to pay for part + shipping.
They misunderstood my message in a passive-aggressive way, basically stopped reading at “I bought it on AliExpress,” and replied with “we only offer software support.”
I even posted them an unlisted youtube video showing carefully and in detail the issue: they didn’t bother watching it. I even showed other Anbernic consoles in the video to proved them I’m an Anbernic fanboi for years, they didn’t care.
I showed them my direct orders (around 300€ worth: RG406V, RGCubeXX, cases…) — no interest.
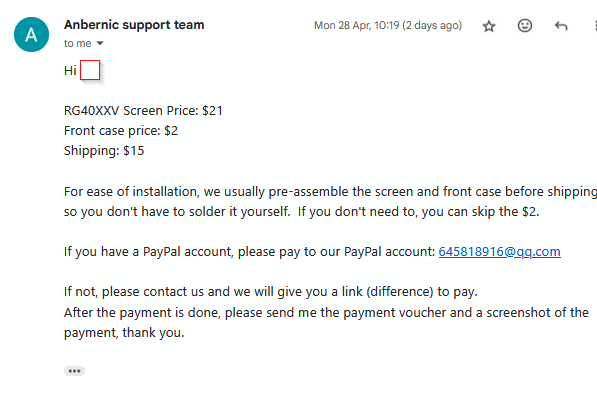
After pushing multiple times, they eventually offered a 40€ “fix” (a full front shell) or $2 less for just the screen (38€), but requiring payment to a random sketchy PayPal account with no guarantees whatsoever the screen would have any warranty and if it didn’t work or was broke in transit I was on my own.
Wonderful support for a hardware company. /s
Since official channels clearly weren’t interested, I decided to try to fix it myself. I mean what’s the worst that could happen? That I have an RG40xxV with a non working screen like I already have?
Summary of the situation:
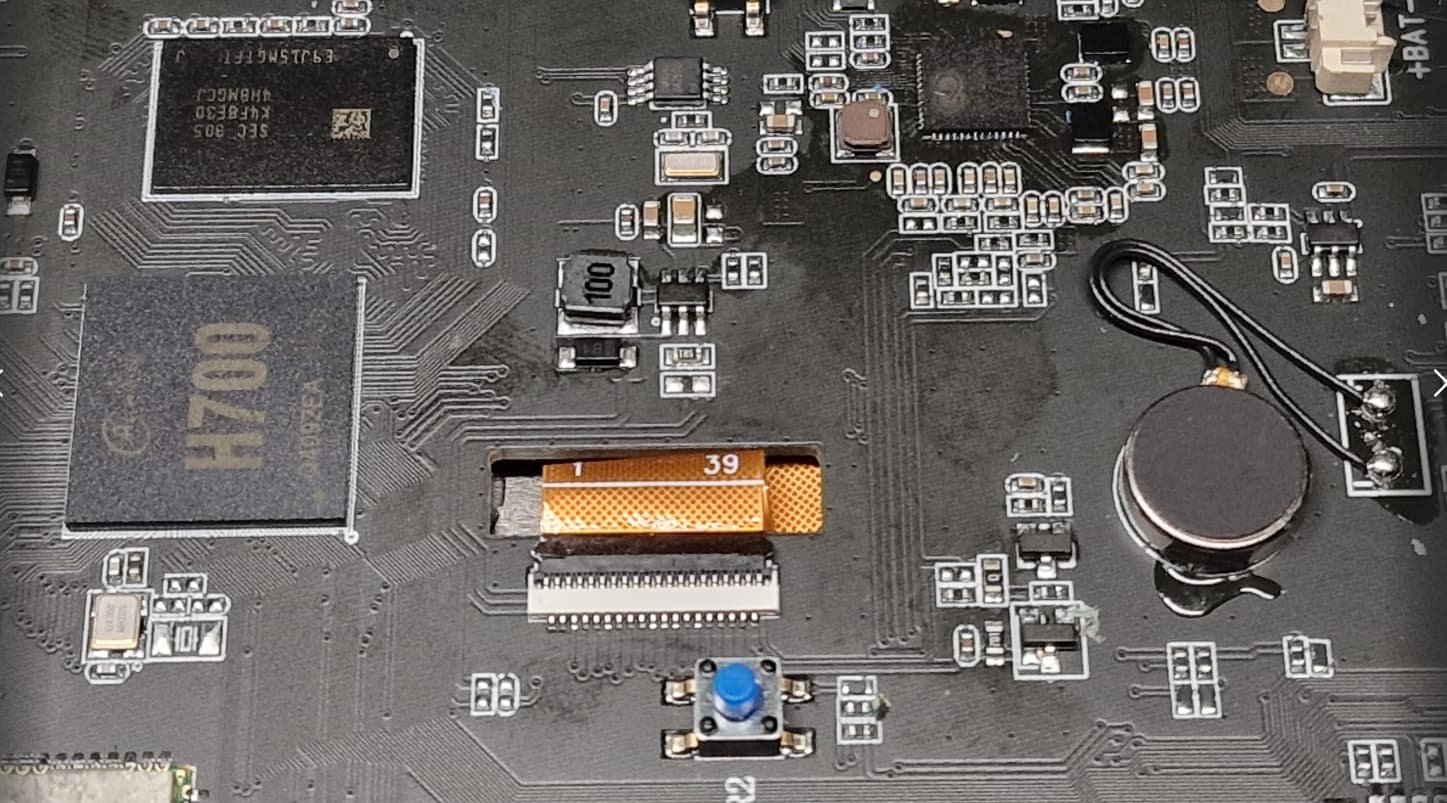
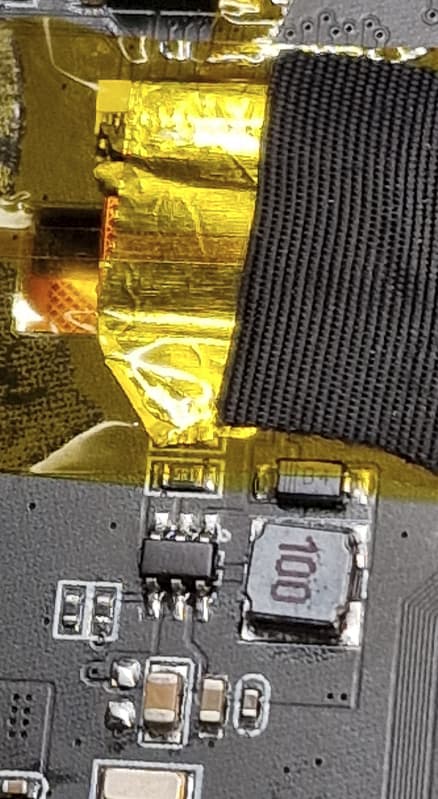
-The warmth and rattle from normal use probably caused a partial detachment at the screen’s ribbon-TAB area (NOT the board connector).
-The panel connector is flimsy — held to the shell with a microscopic amount of glue — and highly susceptible to stress damage (which explains why people report these failures after low-height falls). Even the screen itself is barely held with barely any glue to the front shell.
-Symptoms: static vertical colored bands (mostly red, sometimes green/yellow) getting worse after heating (charging or long gaming sessions).
First Fix: Board Connector Area (Scanline Effect Fix)
-I noticed that after the pocket incident, even at the MuOS menu level,
the screen had a weird “permanent scanline shader” effect — faint horizontal banding, not just pixel artifacts.
-I traced it down the best I could or knew, to electromagnetic interference (EMI) from the mainboard, specifically the H700 SoC since it’s very close to the ribbon, which I believe is why they include this mysterious fabriclike textured tape for.
Solution:
-
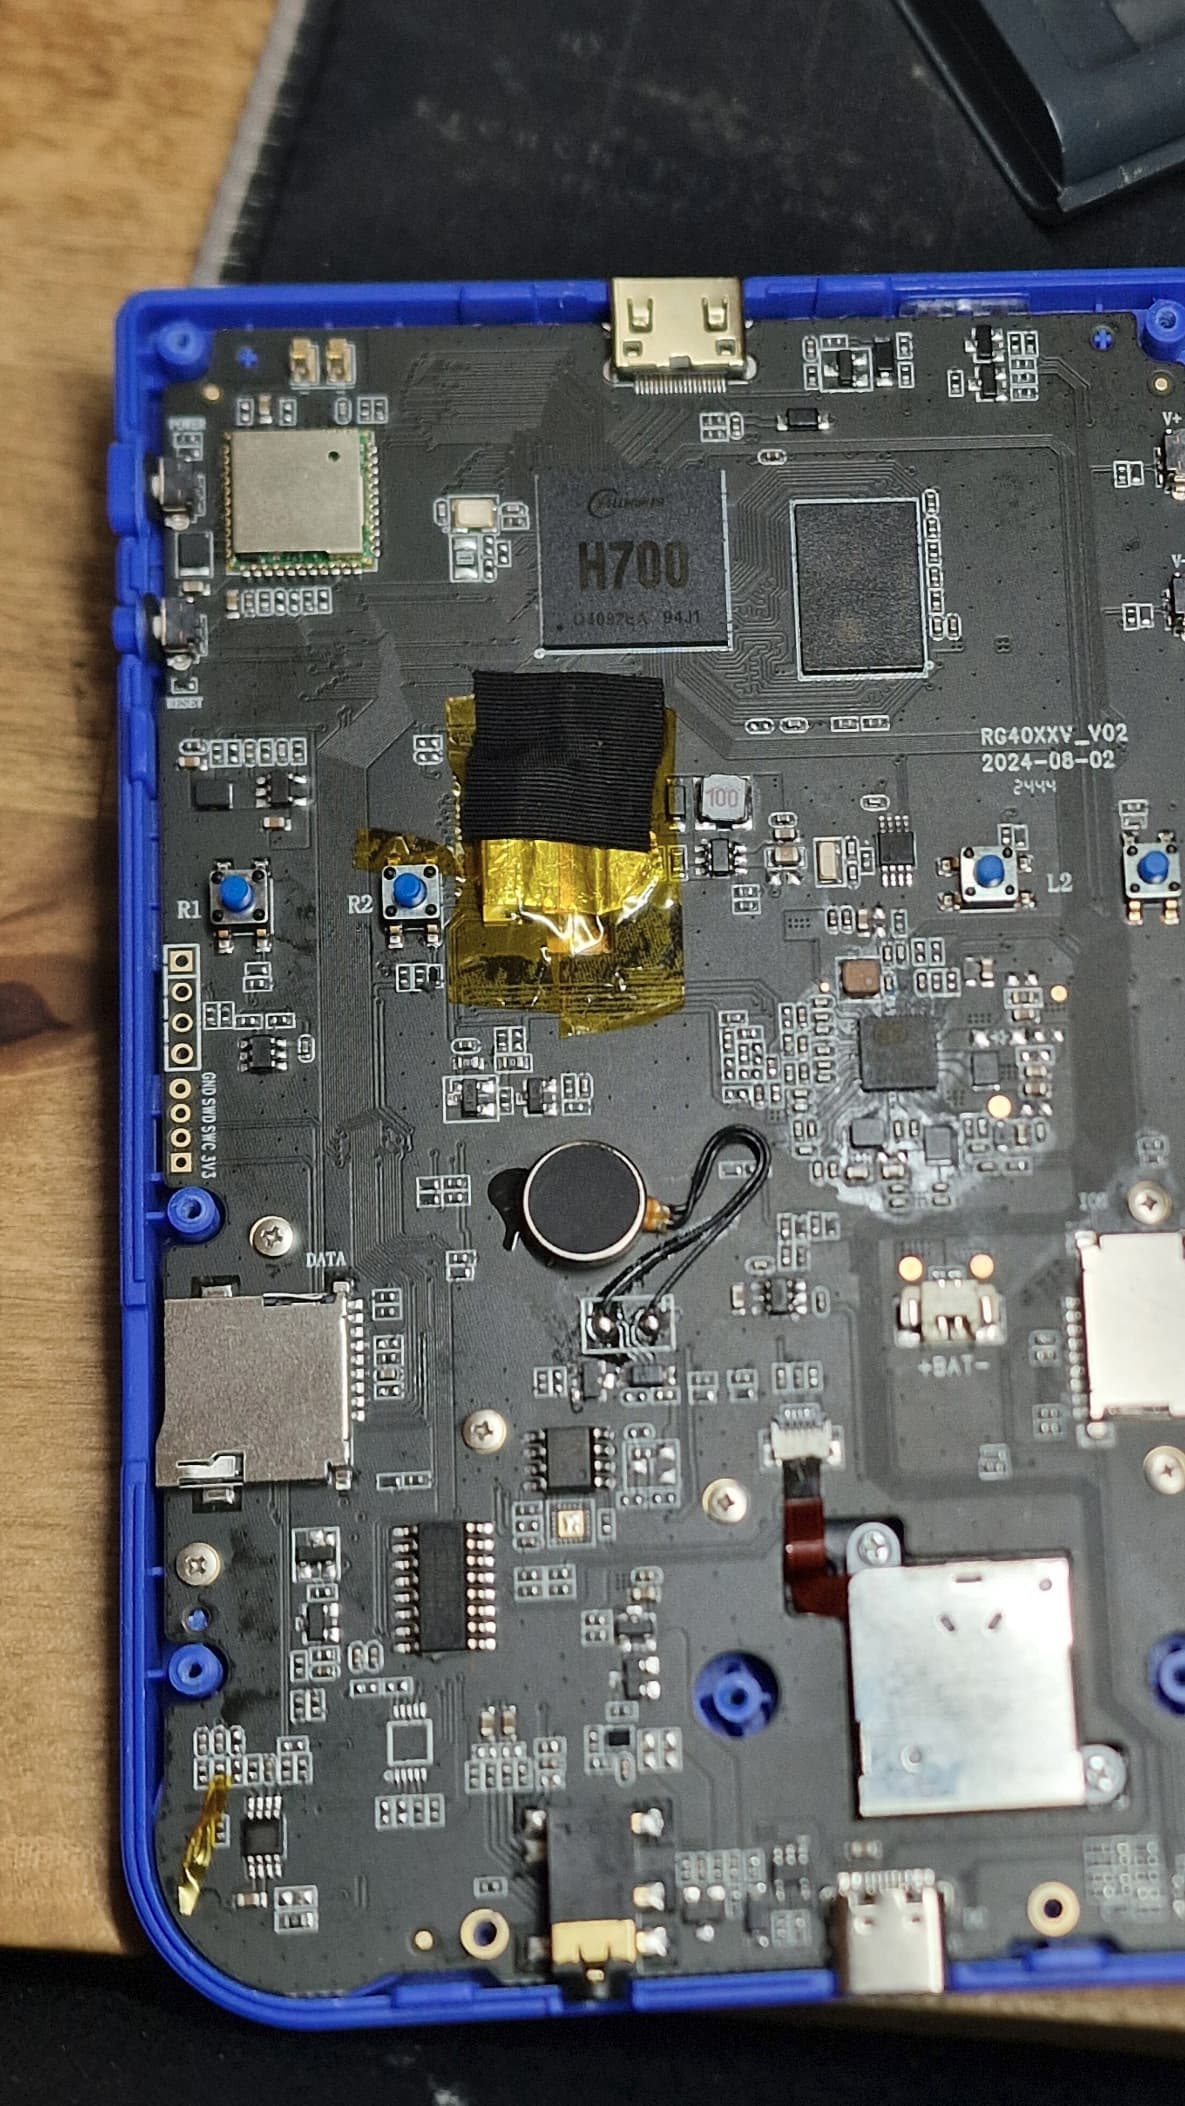
Added a small piece of grounded tinfoil (carefully connected to a nearby GND pin — confirmed with multimeter continuity to the USB-C case).
-
Secured it with kapton tape, carefully avoiding carefully nearby SMD components so they wouldn’t short.
-
Reapplied the original black factory fabric-like tape over the area to restore EMI dampening.
Result:
- Scanline effect vanished completely.
- Display looked “normal” again — but vertical colored bands persisted albeit less prominent
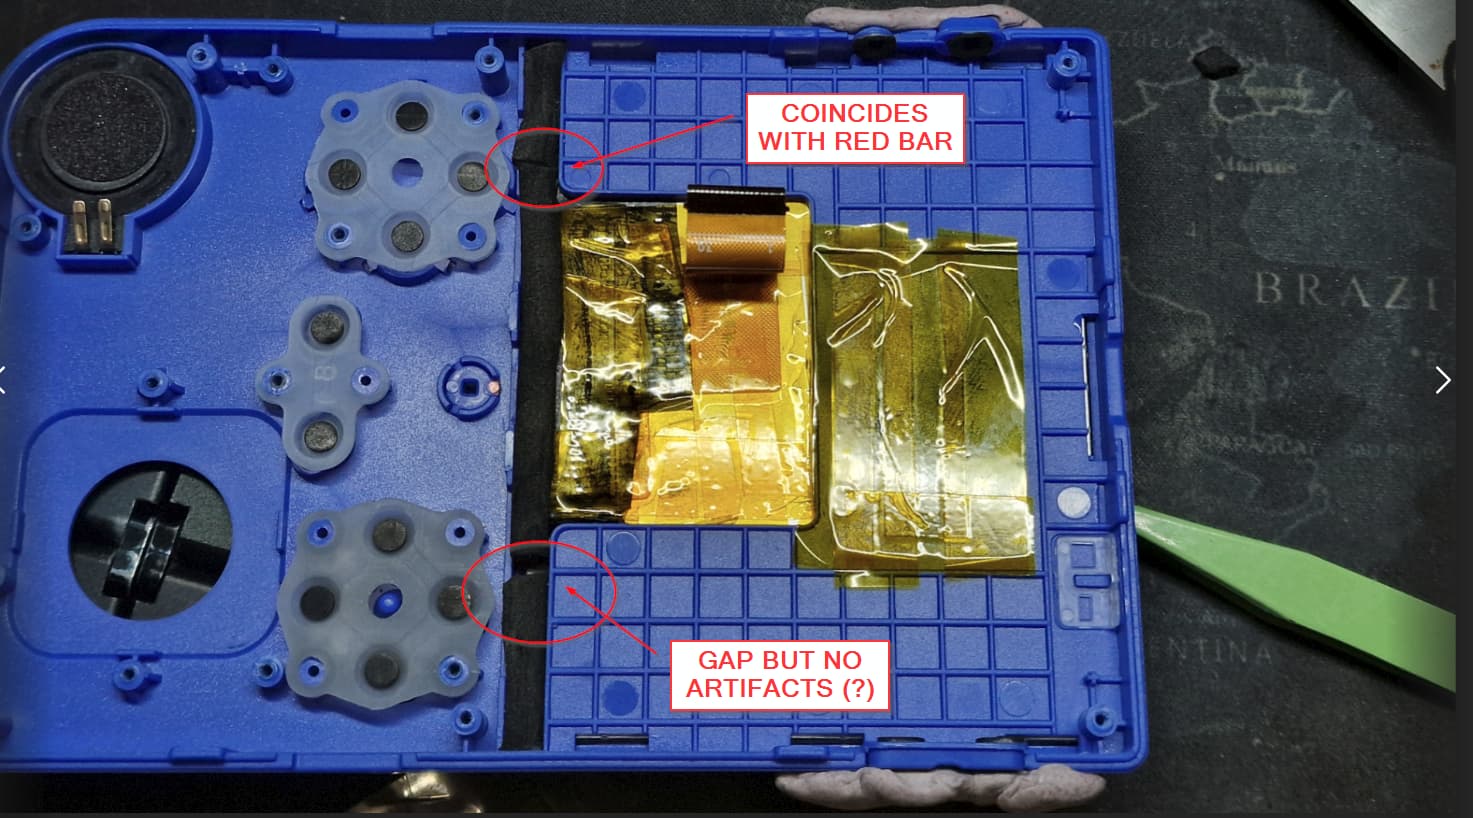
Second Fix: Panel TAB Area (Mechanical Pressure Fix)
Since the board connector fix wasn’t enough, I tackled the other end — the panel itself.

What I did:
1. Opened the console.
2. Confirmed the ribbon cable near the screen had zero mechanical support — basically floating.
3. Added soft foam padding to lightly compress the FPC/black tape area toward the screen to stabilize the TAB connection.
4. Sandwiched layers:
◦ 3M duct tape under the structure of the back part of the front plate (tucked carefully for mechanical adhesion),
◦ Kapton tape over the top to hold everything (since the issue worsened with heat and the area gets naturally warm when lit),
◦ Foam wedge to apply gentle pressure on the TAB.
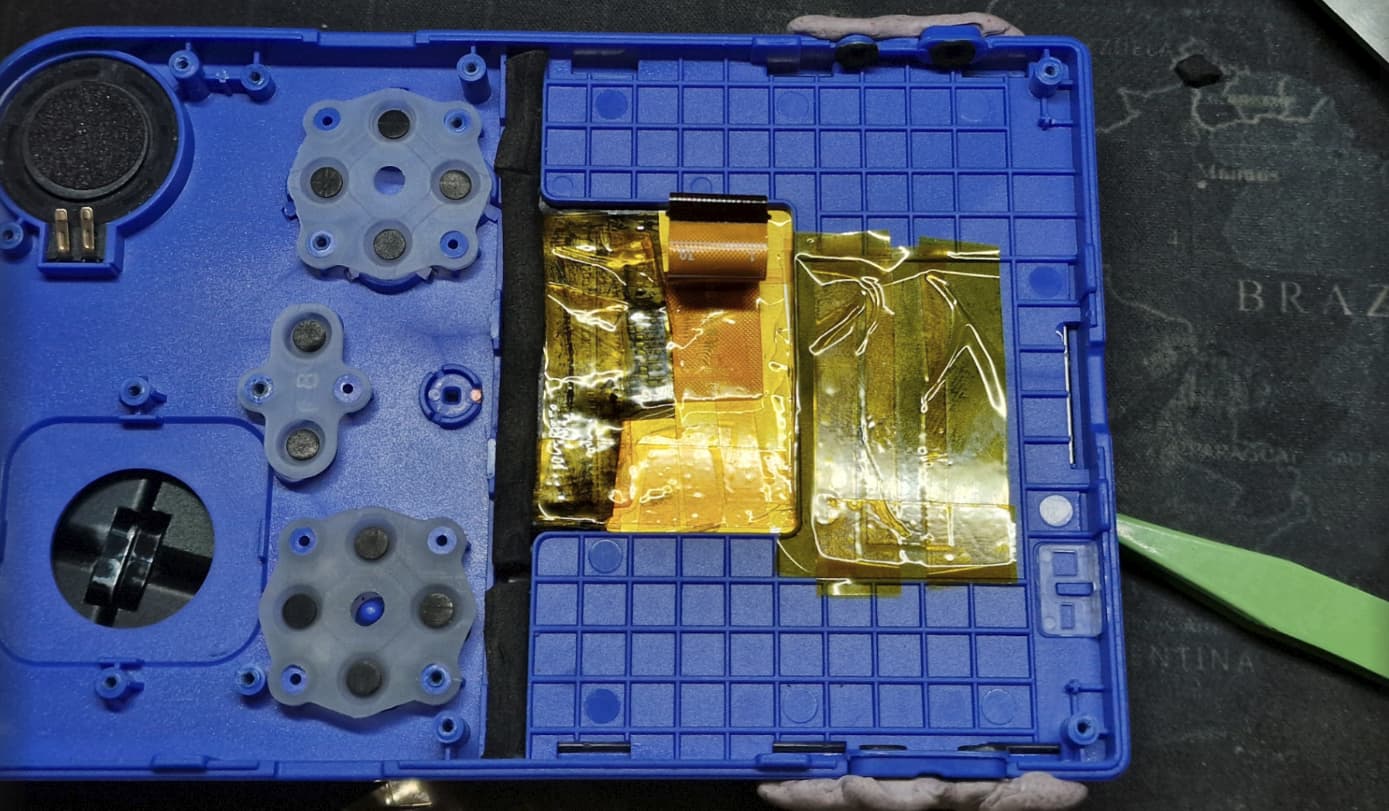
- Carefully reassembled, ensuring no over-compression (overdoing it caused backlight bleeding during one early test).
- Observed that artifacts now only appear very faintly after very long play sessions — otherwise, the console is completely playable.
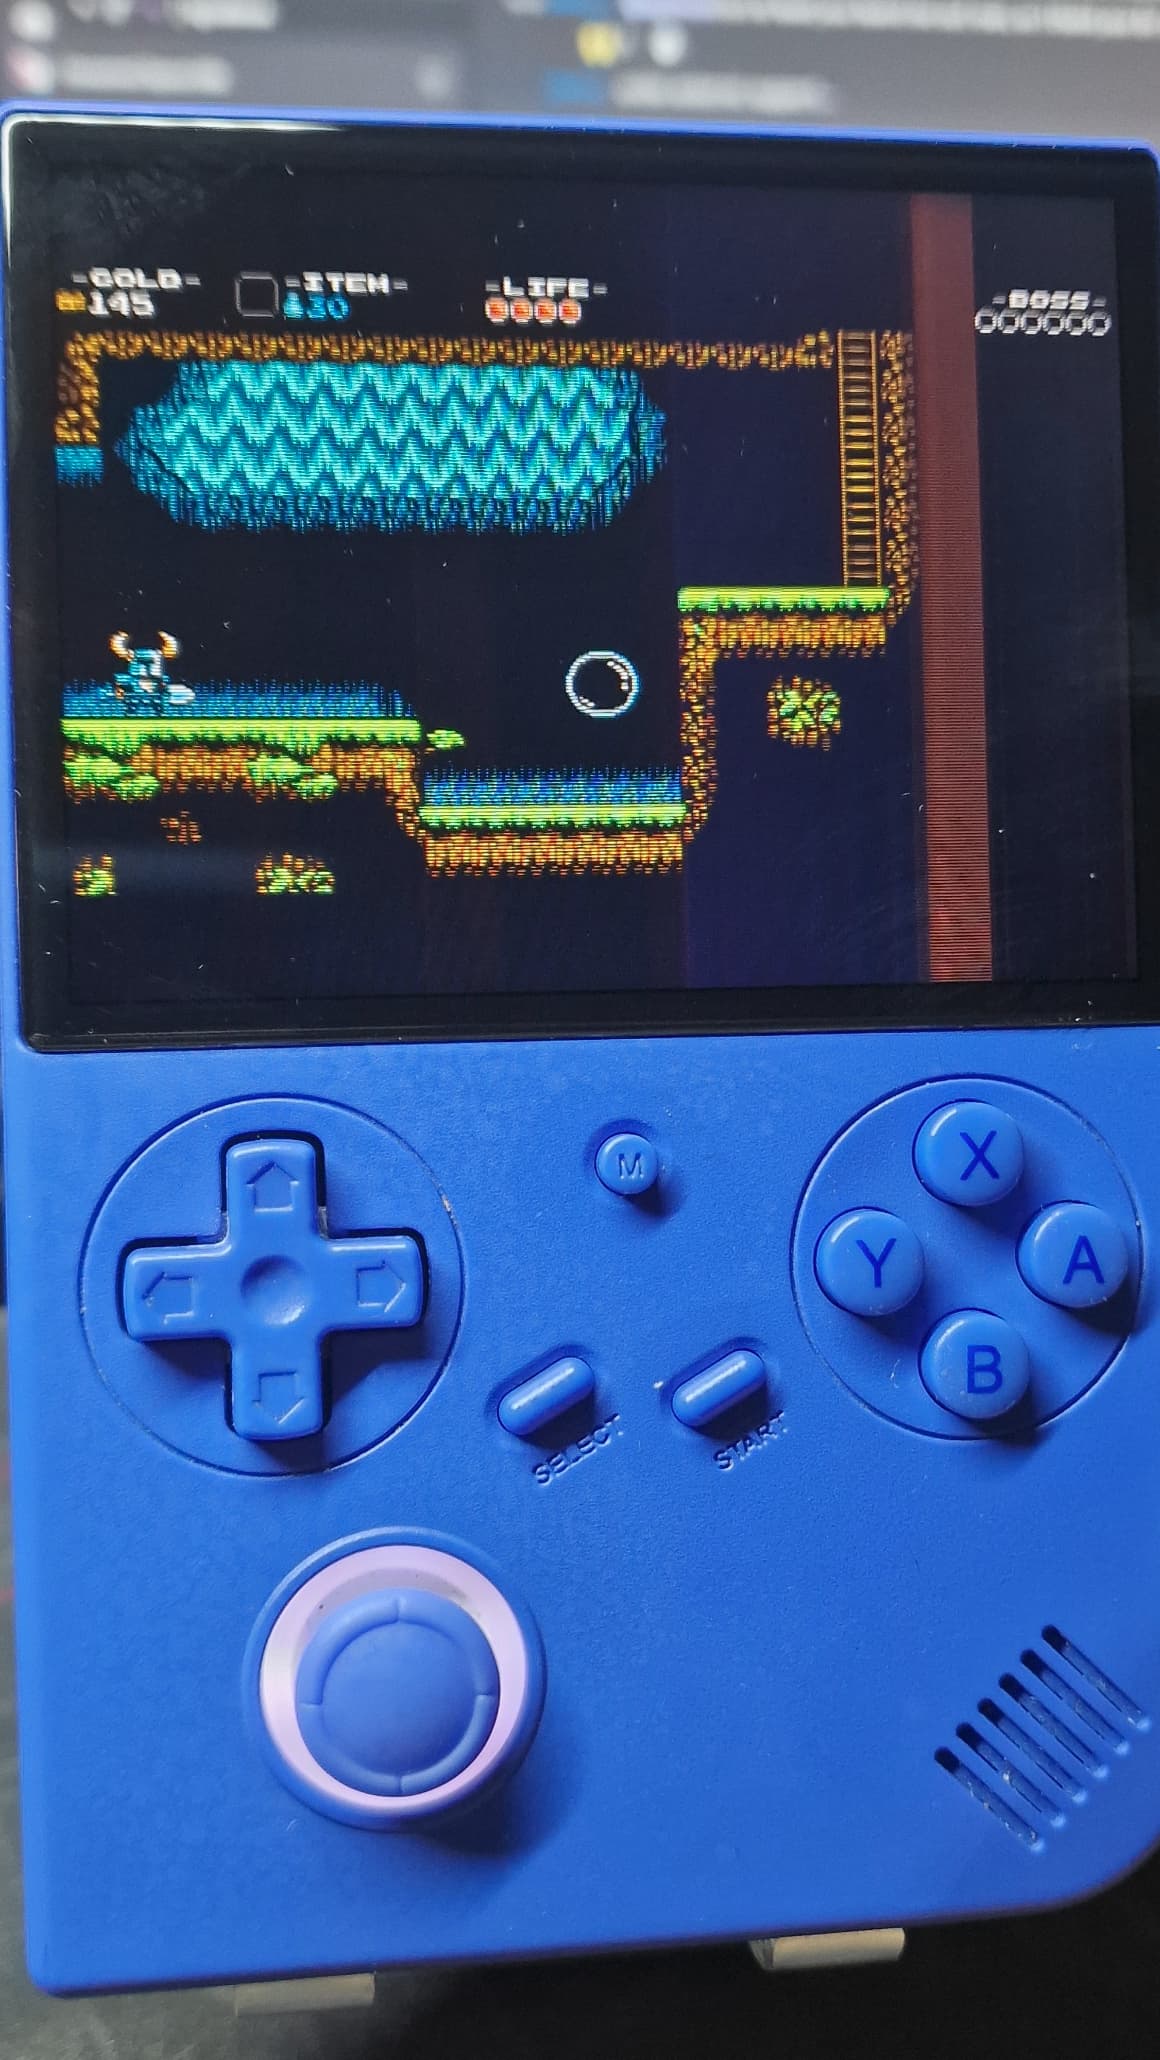
Results: (Here’s an example playing Shovel Knight port (same spot in the game for comparison)
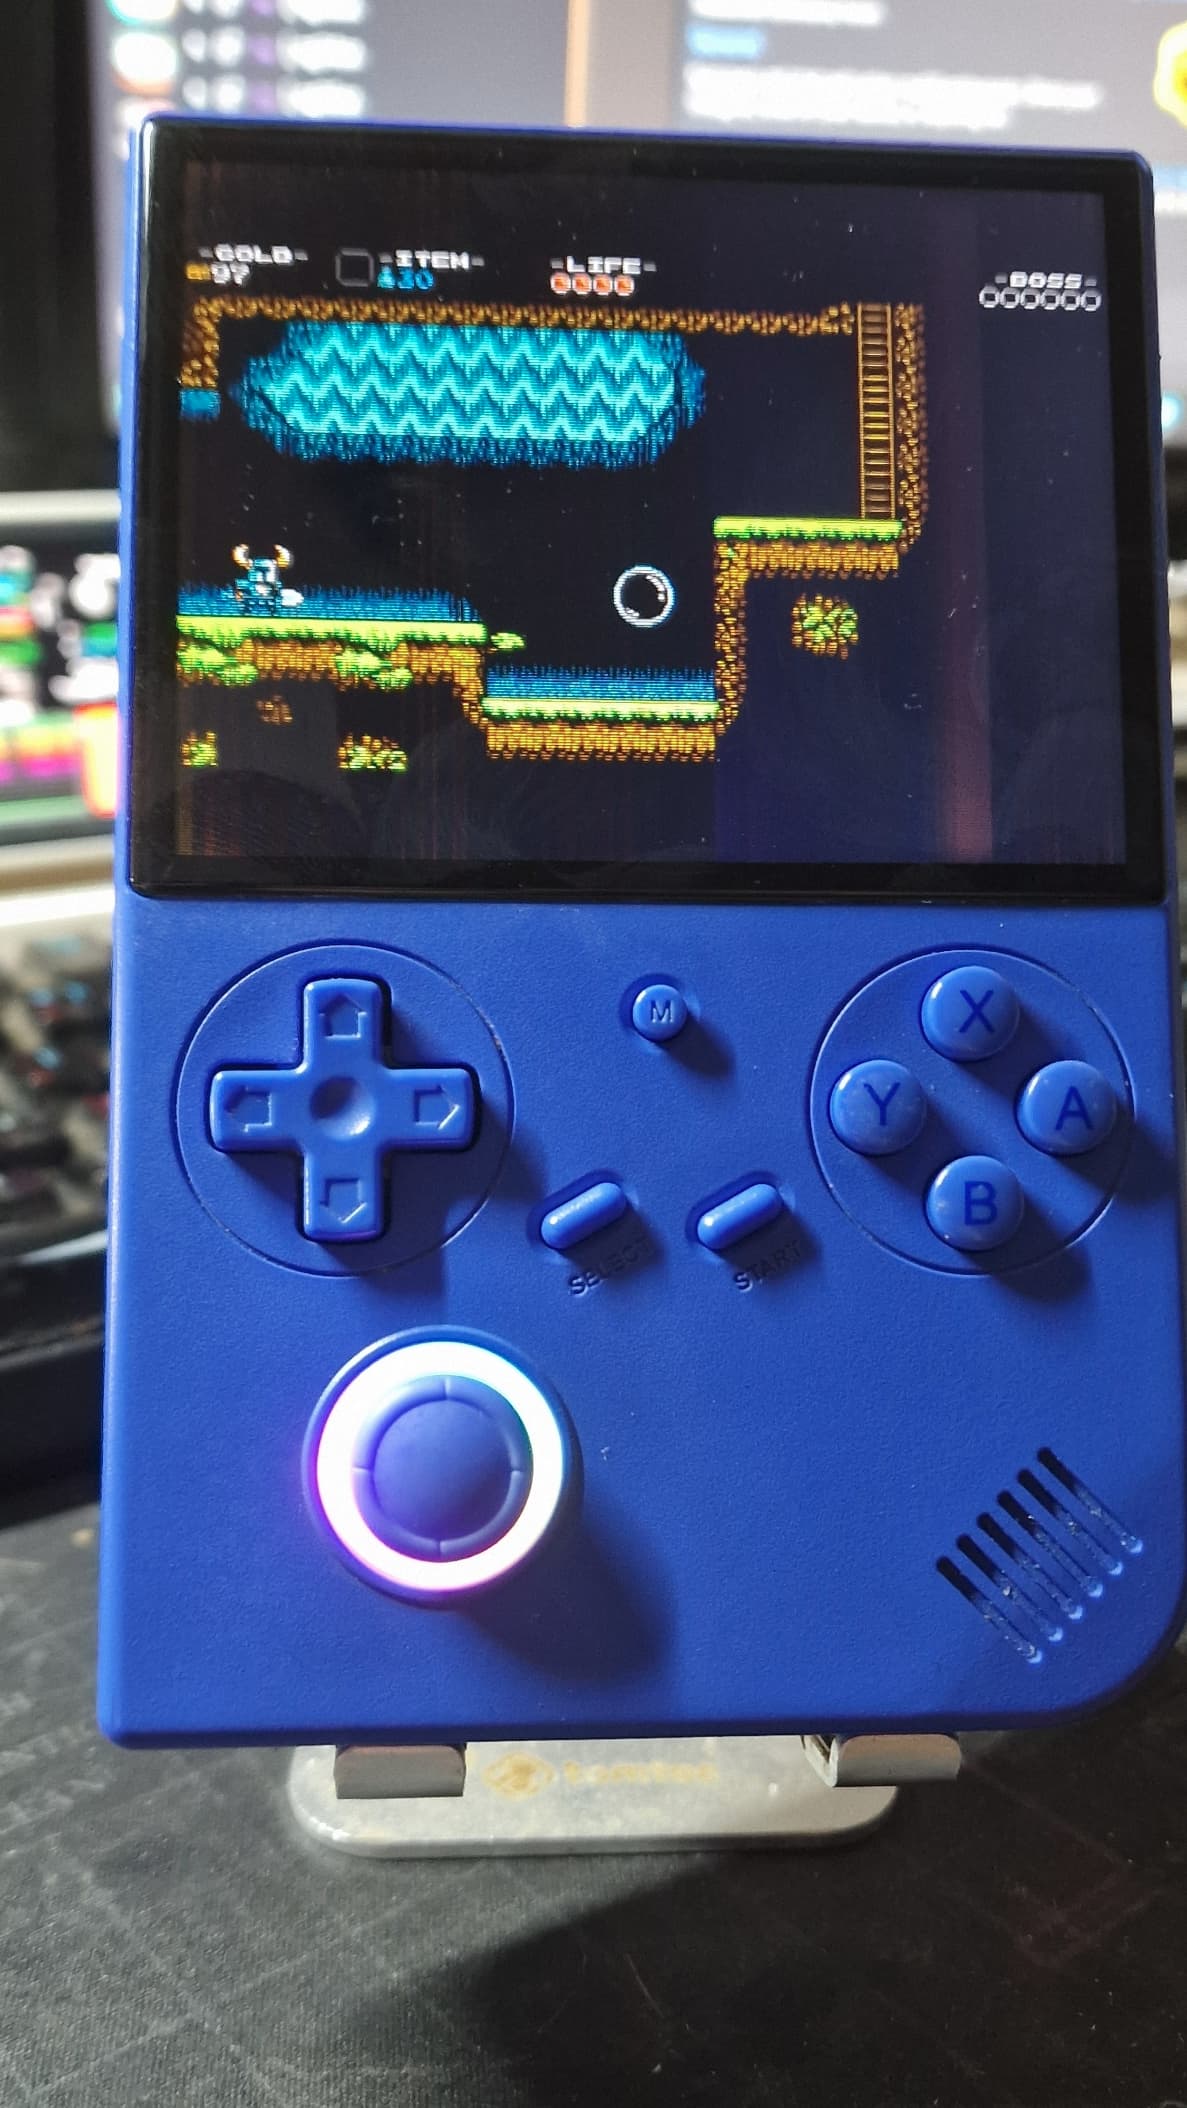
• Major improvement.
• Screen now holds even under charging and extended gaming.
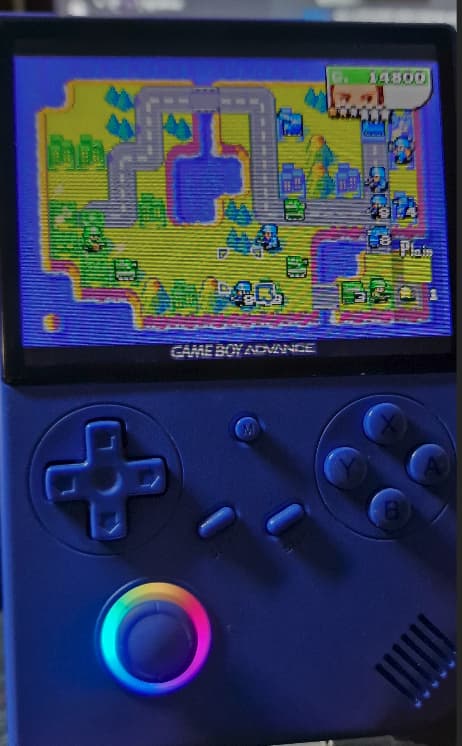
• Defect is still technically there, but 90% suppressed. Only really noticeable in pitch black gaming situations. Here for example is how it looks like playing for example Advance Wars 2 (GBA)
• From “almost unplayable” to “good enough that I’m not buying another console.”
• There’s still a small artifact that correlates with a foam wedge gap but it’s minor.
I’m sick tired of opening 11 screws + the 6 shell screws, also I’m not sure if I’m trying to beat a dead horse here and the screen is damaged beyond repair. In my humble opinion, the main culprit being the TAB (thge ribbon connection that attaches to the actual screen , so the other end of the ribbon cable) moved with the heat / ratting from my pocket. This places this console in the durability of a piece of chinese porcelain.
I post this with my only hope that, even if it didn’t fix my beloved rg40xxV fully (this was my favourite retroconsole ever), I post this in hopes it might help someone in the future who comes across this post, and hopefully give me a tip or two how to do this properly.
Let me know if you have suggestions that I could do or things I could have done differently.
Jeebus